Showing posts with label wreath. Show all posts

Saturday, April 19, 2014

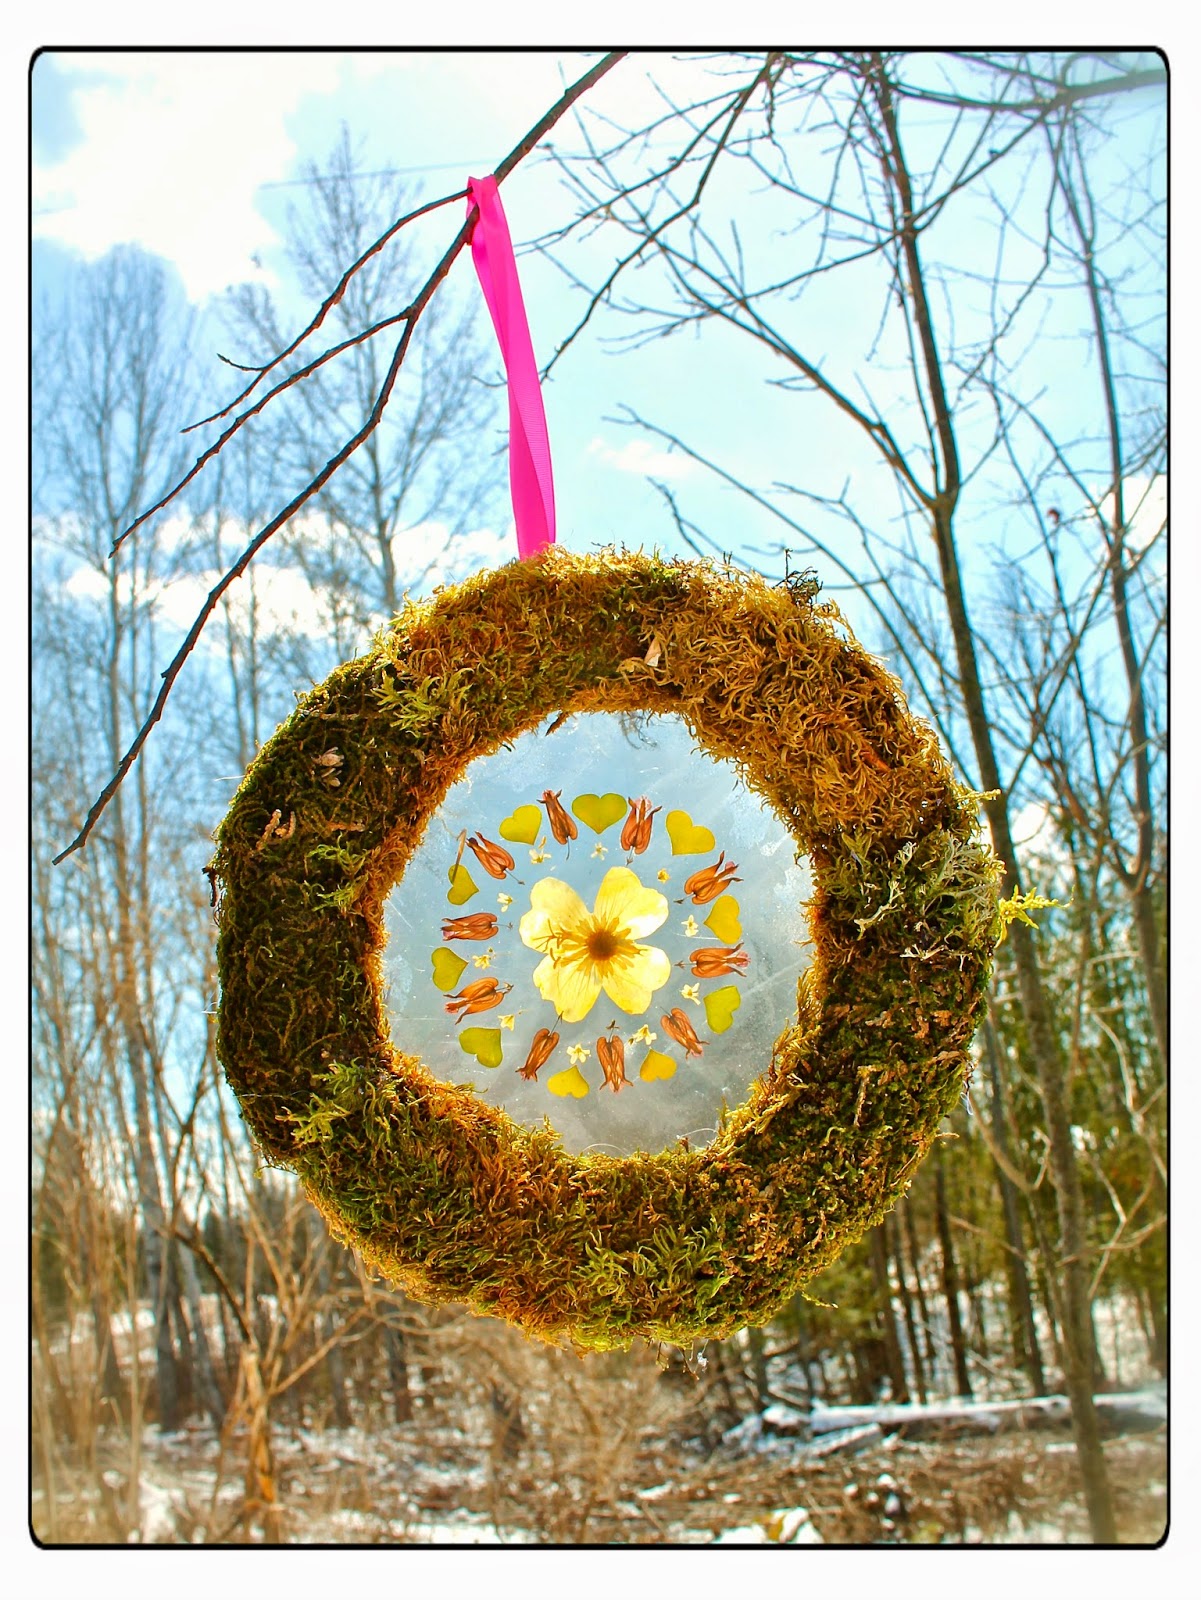
Spring Wreath


{Confession} My Valentine wreath hung on my door until today. Yep. Even though each time I looked at it I was reminded that I needed to change it up, winter was being so stubborn that I was left a little uninspired. 
Finally spring began to show her face and inspiration hit!

To create you will need:
grapevine wreath
mactac (also know as contact paper)
pressed flowers
moss
glue

To begin:

Cut two squares of mactac a little larger than your wreath.


Peel the backing off one of your pieces of mactac and tape it down, sticky side up.
 Arrange your flower design in the center.


Peel the backing off your other piece of mactac and firmly press it onto of your flowers. 


Glue it to the back of your wreath and trim off the excess mactac.


Glue the moss onto the wreath.


There you have it!
Ready for the door.


Love and light to you this Easter weekend,

Shanti

Sunday, March 9, 2014

Rainbow Wreath & Flowers


We are mildly obsessed with rainbows over here. With spring around the corner and St.Patty's day inspiration all around, we thought we would have some fun and bring you a week of rainbow crafts! Today we are sharing our rainbow tissue paper flowers and our rainbow wreath. A fun way to bring some rainbow beauty to celebration, play, gifts, dress up... so many possibilities!


Here is what you will need
 rainbow colored tissue paper
 pipe cleaners
scissors
glue


To begin,  take a sheet of each color of your tissue paper and place them on top of each other.
 Next cut your stack into 4 squares and arrange them in the order of the rainbow on top of each other.


Then take your piles of tissue paper squares and fold it accordion style ~  folding it over 1/2 inch to 1 inch then folding it back the other way. It should look similar to a fan when you open the folds.


Tie the middle together with a pipe cleaner ~ leaving the majority of the pipe cleaner for the stem.


Next, use your scissors to form the shape of the petals, by rounding off each end of your folded fan.


Now you are ready to open your flower.  Gently and gradually pull the top sheets away from the others up towards what will be the center of the flower. 


 Repeat this step with each subsequent layer of tissue paper until you have done this for all of them.


After you have separated the layers play around...fluff them up and bring them to life!
There you have it!
Rainbow love.


With left over tissue paper we thought it would be nice to dress up with it a bit! The rainbow wreath is super simple. We twisted a pipe cleaner to fit the head. Cut rainbow tissue paper into squares, scrunched the paper into "little flowers" and glued them on to the pipe cleaner.


To top it off we cut some strips of rainbow tissue paper and stapled them on the back.


It was a hit!


Rainbows just seem to bring out the smiles.


In rainbows and sweet smiles,

Shanti

Wednesday, January 15, 2014

Sumac Valentine Wreath

  
I was on a beautiful winter walk recently and happened to spot a sweet small forest of sumac. As I admired their bright red against the white snow ~ inspiration hit ~ such lovely gift from nature to create a love-filled wreath with! 


I gathered up an armload of the velvety berries (being sure to leave lots for the birds) and headed home to give it a try. 


To create you will need:
cardboard ( I used an old pizza box)
Sumac berries (staghorn sumac  ~ be sure you know exactly what they are meant to look like before heading out to collect!)
glue gun 
ribbon

To begin, draw what ever size heart you want your wreath on to be and it cut out.


Fold your heart in half and cut out half a heart shape from of the center.


Tada!


You can then fire up your glue gun...


and begin gluing your berry clusters onto the heart until all the cardboard is fully covered.


Next, fold your ribbon in half and glue the folded part to the back of your wreath for hanging. 


Then if you choose you can then add a little glitter to bring some extra sparkle to your love. To encourage the glitter to stick as well as to help preserve your wreath, give it a spray down of hairspray before shaking on the glitter.


We shook it on and then took if outside in the sunshine to test its "sparkleability". It passed! 
Ready for its new home.


 Our heart full of love now hangs as a welcome to all!


May love and sparkles find you where ever you are.

Shanti

ShareThis

LinkWithin

Related Posts with Thumbnails