Welcome friends...
Please help us welcome our special guest poster, and friend
Mrs Bloom of We Bloom Here
Please help us welcome our special guest poster, and friend
Mrs Bloom of We Bloom Here
Fields of Butterflies
a Picture Lantern Tutorial from We Bloom Here
For this craft you will need:
-- Wide-mouthed glass jars from jam or peanut butter (wash and remove labels)
-- Mod Podge or diluted white glue
-- A wide paint brush
-- Dark and light green German kite paper or tissue paper
-- A butterfly-shaped craft-punch (this is optional – you can use scissors to cut butterfly shapes)
-- Some patterned craft paper (wrapping paper, scrapbook paper, a colorful magazine photo or a recycled greeting card will work just fine.)
-- A pair of scissors
Start off by trimming your
light green paper to fit the height of the jar.
Paint on a thin layer of Mod Podge (or diluted glue) and immediately
apply the green paper. The paper will
crinkle a bit when it comes in contact with the wet Mod Podge; please don’t
worry about this. Just smooth down any
big wrinkles and apply a bit more Mod Podge along the edges to attach them
securely.
Next, trim some grass from your darker green paper. My grass is about 5 cm (2 in) high. You may want to trim your grass taller or shorter, depending on the height of your jar.
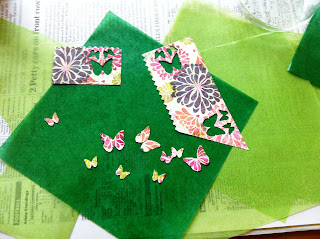
After your grass is trimmed, use a butterfly craft punch to create butterfly shapes. As noted in the supply-list, if you don’t have a butterfly craft punch, you can certainly use a pair of scissors to create butterfly shapes!
Having the company of a curious kitty is always nice, don’t you think?
To add the grass to your jar,
paint some Mod Podge on the bottom half of your jar and then apply the dark
green paper you’ve cut. If any of the
pieces of grass curl up, gently press them down so they stick to the Mod Podge,
then apply more Mod Podge over the grass, brushing upwards, from the bottom of
the jar towards the top.
To add the butterflies, paint a generous dab of Mod Podge on the spot where you would like your butterfly to hover. Place the butterfly on top of the Mod Podge dollop and then slather a generous amount of Mod Podge on top of the butterfly. It will look rather untidy, however, once the Mod Podge dries, it will look grand!
When the Mod Podge is dry you can light candles inside your lanterns and enjoy the sparkle of early summer sunshine. I think I can even hear a flurry & flutter of delicate wings… can you hear them, too?
A special THANK YOU! to the lovely M. Bloom!!!
Please go visit our good friend M Bloom at We Bloom Here
xo maureen & shanti


What a gorgeous tutorial! Thank you so much for sharing here:)
ReplyDeleteSimply beautiful--looking forward to trying something like this!
ReplyDeleteSo cool, I just love Mrs Bloom's blog, she is so, so crafty, cheers Marie
ReplyDeleteSo glad you are back to posting! Great idea for a lantern- the possibilities are endless- different pictures/scenes for different seasons and festivals. Thanks for sparking the creative fire!
ReplyDeleteI'm so glad you are back in blogland ~ when I started blogging at the end of last year and found your blog I was so excited, and then I realised you were not blogging anymore ~ so thrilled you are back :-)
ReplyDeleteI love the lanterns they are so pretty!
ReplyDeletexoxo
~ joey ~
P.S. Will you be making a button that we can put on our sidebars to link to this?
DeleteThank you ladies for participating in our first "all spunk...no junk" link up!
ReplyDeleteI will be making a button...I thought I had it all figured out...but I have to tweak it a bit. Hopefully in the next few weeks we'll have one that you can put on your blogs! Thanks for asking!
xo maureen
maureen they turnred out beautifully!
ReplyDeleteWhat a beautiful lantern project, I love the way it turned out!
ReplyDeleteAfter I originally commented I clicked the -Notify me when new comments are added- checkbox and now every time a remark is added I get four emails with the same comment. Is there any approach you'll be able to remove me from that service? Thanks! casino slots
ReplyDeleteI am sooooo going to do this
ReplyDeleteAre you ready for a new journey into the world of the biggest forays of today? Join our Biogaming 789 Casino, the newest system, True Money Wall, True Money Wallet for gamblers. New face That is inconvenient to use the account system, we have created suitable options for you, all day deposit-withdrawal service. biogaming
ReplyDeleteFor soft skin I personally prefer trimmers.top 10 best trimmers
ReplyDelete