Wednesday, June 30, 2010

Spinning Garden Mandalas


Garden season is here!
Seeing as we spend many hours at a time enjoying it, we thought it might be nice to create some flower art to enjoy in our garden.
We happen to have lots of old cds kicking around so we thought we would see if we couldn't put them to use!
Here's what we came up with.

~ A Spinning Garden Mandala ~
To create you will need:
Pressed flowers and leaves
White paint or white flowers for the background
Outdoor mod podge
paint brush


To Begin:
Cover the cd with mod podge then top it with white flowers (we used pansies) or paint it white, then brush on another layer of mod podge.
Arrange the flower mandala design on top of the white.


Then, gently cover over top of your flowers with more mod podge


So many possibilities!
These monarch wings were picked up along side of the road after they had been hit.
Now they shall live on in our garden.


Hang your mandalas with some fishing line...


find a tree for them to live in...


and let them spin and sparkle away!
Garden magic.

~ Shanti ~

Monday, June 28, 2010

It's Mod Podge Tuesday...Let's Make a Pretty Hot Air Balloon!!!!


This is a great MESSY, multi day craft to do with the kids...I know sometimes I struggle with getting out the messy stuff...but, when I do, we have so much fun!!  We decided to invite some friends over to join in on the messy fun!  Here's how you can make your own paper mache hot air balloons!!!
Day one...to make the balloon you need:
strips of newspaper
a blown up balloon
paper mache paste
*equal parts water and flour mixed together makes a great paste!


Start by dipping your newspaper into the paste...using your fingers get off the excess paste and lay it on your balloon.  We used yogurt containers to hold up the balloons while we were putting on the strips...it's not perfect, but it did help some!  Lay on about 2 layers of newspaper strips, and make sure your entire balloon is covered, (except for the bottom nib, where you tied off your balloon)!  Now, put it in a nice warm place to dry.  It may take a day or two...wait patiently!
Day two...You will need:
scissors
Gesso
paintbrush


Next, you will pop your balloon and then using the little hole, get your scissors in there and cut out a larger hole.


Give your balloons a coat of gesso, and let them dry again!  Thankfully, you won't wait too long, gesso dries fast!

Day three...You will need:
tissue paper, (in whatever colours you fancy)
Modge Podge
brushes
Cut out paper shapes...we punched out butterflies using a paper punch!


Cut or tear your tissue paper into squares or rectangles or whatever...it'll look nice no matter what you do!


Dip your brush into the Modge Podge and spread it liberally on your "balloon", then put the strips of tissue paper on, and more Modge Podge over that...do this until your entire balloon is covered with colourful paper...then add your extras, put on your shapes the same way...be sure you layer on the Modge Podge over top...this gives it a nice sheen.  We actually used Glitter Podge for this project..the results were gorgeous!


Here are our three finished balloons...now there is one step left...adding the basket!!!

Find something basket like...we used the container from some soup base...you could also use a single serve yogurt container, apple sauce container...or be creative and see what's around you!
You will also need your Modge Podge and some pretty papers!


Again, cut up your paper into squares or strips...brush on the Modge Podge, lay your paper over top and put another coat of Modge Podge over top...do this until your container is covered.  Now let it dry, (it won't take long). 


For the next step we used a drill...I imagine you could also use a hammer and a nail, but it would be a bit more difficult.  You will need to make 4 holes on your "balloon" and 4 holes on the basket.  The holes should be evenly spaced apart...just eyeball it!  You will also need one hole at the top of the "balloon"...this is for hanging up your finished creation!


Now get out some string...cut four pieces into equal lengths...tie them onto your "balloon" part first, and then tie them to the basket...pick it up and make sure it's all straight!  Then tie a piece to the top of your "balloon"...make it as long as you please...we just tied a big knot in the bottom to prevent our string from slipping out!


and VOILA!!!  Have any little friends who need a lift???


Now...here's a craft confession!  We actually made the "balloon" part of this craft during the winter...they have been sitting on my bookcase for about 4 months, waiting to be finished!   Of course, I kept meaning to finish them with Ruby, but time just passed us by!  She was delighted when the other day, I suggested we finally finish our balloons!!
So...take your time doing this one...the result is wonderful, and I know that this balloon will be put into prompt use...Ruby has many little "friends" in her toy box who will enjoy riding in the fancy hot air balloon!

Happy crafting!
maureen xo


Sunday, June 27, 2010

"Mod Podge" Monday...Let's Make a Rainbow Lantern!!!


Don't worry...she can't burn her nose...it's a battery operated tea light!!!

We've had rain almost every day this week...well, you know what that means here at the Toadstool...bring out the craft supplies.  Shanti and I decided that we wanted to have a week devoted to Modge Podge...there is just SO much you can do with a jar of Modge Podge and a little imagination!!  So...since it's summertime, and we spend alot of time out on our porch, we decided to make some rainbow lanterns! 

If you want to make some of your own you will need:


a jar...whatever size you wish, (we used a 250 ml jar)
tissue paper in rainbow colours
foam brush or paint brush
Modge Podge

To start:


Cut a strip of tissue paper about an inch in width...then cut that into squares or rectangles...
you'll need enough to go around the width of your jar.  Get your jar and put on a layer of Modge Podge...lay your tissue paper on top of that...and then spread on more Modge Podge overtop...


Keep going...one colour at a time.  You'll have to overlap the colours a bit...trust me, it'll still look great and rainbow-y!  Go all the way to the rim of your jar...


and let it dry!!!

You can use this as a little lantern, vase for flowers, loose change...whatever you fancy!  This was a sweet and simple craft that we all did together, it took very little time and the results are wonderful and colourful!!

Sending you rainbows!!
xo maureen

Saturday, June 26, 2010

My sweet little gnome...


I finally got around to sewing up a gnome hat for Matilda.  The pattern comes from "Bend the Rules Sewing" by Amy Karol...if you haven't seen the book, it is full of great, colourful, fun sewing projects, (and for the novice sewer, the instructions are clear and easy to follow)!!  I used 100% wool felt for this project, (I do find that wool felt generally holds up better over time...but heck...use whatever you darn well please!!)


Here is the full on front view of the hat...it's a little big on her, but she just LOVES it!!!


And here's the view from the side...with a little flower embellishment!!

It took very little time to whip this up...about an hour tops.  And if you're wondering how in the world I found the time to do this...well, here's my confession...I locked myself and the kids upstairs, and they played while I sewed my heart out, (our upstairs is open concept...three quarters bedroom/playroom and one quarter mommy's craft nook!!).  Gotta love it when you can fit in a random act of sewing while the kids happily play!!

Hope you all enjoy a weekend bursting with creativity!!!!
maureen xo

Friday, June 25, 2010

Poppy ~ The Colorful Mess Fairy!

We have quite the enthrallment with fairies in our home. I seemed to have had this pull towards them for as long as I can remember and now find such joy in creating, experiencing and imagining the fairy realm with my girls.
Recently  when I woke up to another rainy day, I decided it was time to switch things up. This inspired me to  let go of my normal expectations for our day and move into a new kind of day...simply creating. I dubbed the day ~ "let's make a mess" day. I gathered up what ever supplies called out to  me, piled up our table up high, turned on some music and proceeded to witness and partake in the  bliss of creating! It was a wonderful way to pass the day. One of my  favorite  creations was this wee fairy folk Luna created ~ Poppy...


Here is what she used from our pile of creative goodies for her creation...


she wrapped the body with some pipe cleaner


cut out a dress from some red felt, slipped it over her head and stitched the dress together with embroidery floss


 glued down two petals from a silk flower to make the wings


added some yellow wool roving for hair, tied some pigtails, glued on a silk flower skirt and found a flower wand.  Luna was lost  deeply in her realm of creation ~ carefully stitching, gluing, assessing, asking for help when needed and then glowing with pride with her outcome.

Poppy soon had a friend created by Solana ~ once she saw Luna enjoying her new fairy she simply had to create one too (with help). These new little friends occupied them for many hours afterwards in their fresh faced fairy world.


These little fairies often live on our nature table but sometimes a I catch a glimpse of them in the small fae homes that the girls created for them beneath the nature table. I am grateful to have these gals that keep me in tune with enchantment and I am reminded of the gift it is to occasionally drop all the expectations of the day, make a huge colorful mess and create the day away!

From my colorful mess to your colorful mess
~Shanti~

Thursday, June 24, 2010

Going out on a bang...homeschool style!!!

A few of the kids...drumming their hearts out!!

Yesterday we had our last homeschool gathering of the "school" year.  For the past few months, we've been tapping into our own community of creative people and getting them to come out and share their talents with our homeschool group.  This month we ended with a "BANG" and were lucky enough to have local drumming sensation Jean Bereton along with her lovely helpers Shanti and Dustin come out to do a drumming and rhythm workshop with our kids.  Jean led the children to explore rhythm and all sorts of different rhythm instruments...there were huge drums, bells, sticks, shakers, rattles...oh my!! 

 
The fantastic and lovely Jean in action...

Before the class began, the instruments were being set up, and the kids just dove right in and started making their own rhythm.  Jean looks at us parents standing on the sidelines and says, "This is what I LOVE about children...they just get right in there...and the parents...well, they normally stand on the sidelines waiting to be told what to do!!"  It was true.   


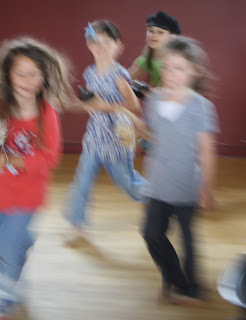
If you haven't drummed before...let me tell you how good it is for your SOUL!!!  The need to make a beat, its just so primal...it speaks to something in our souls that is long forgotten.  If you get the chance to drum, even if you feel less than rhythmic...just do it!!  The children were just full of JOY during this workshop, and my own daughter Ruby, kept drumming on everything in the house long into the evening!  Below are some pictures of the kids in motion...the parents were drumming a beat and the kids were moving and playing some "portable" rhythm instruments.  This was an afternoon of movement and energy...

The kids in motion...

energetic and light...

And how FUN, for us moms, normally on the sidelines or leading a class, to get to participate alongside our children...all learning together! 

A handful of the beautiful mamma friends who were there...

radiating pure JOY!!

Even the smallest people in our group were encouraged to participate!!

Babies and toddlers are just naturally drawn to participate!
  
So...at the end of the day I felt intense gratitude for being a part of the rhythm...being part of this group of children and mothers and teachers!
 
On a side note...while we were happily drumming away and dancing inside the Community Centre, there was an EARTHQUAKE...we were a part of it...drumming our way through it.  In fact, we didn't even know that it had happened until after when we heard it on the radio! 

In rhythm and JOY
maureen xo

Wednesday, June 23, 2010

Maureen's Famous Strawberry Preserve Recipe!!


It's strawberry season here in Ontario...this is one of my favourite times of the year, because it all starts with the strawberry...the other berries will soon be following, and I just can't wait!!   I've been making a conscious effort in the last few years, to put away as much food as possible, pick things in season,  and spend less at the grocery store!  With the strawberries I picked, we made 25 jars of jams and preserves, and managed to freeze 4 bags full.  I'm hoping to get out once more before the season is over...strawberries don't tend to last long in this house, especially in the dead of a Canadian winter!!


I want to share with you my recipe for Strawberry Preserves...this is my absolute favorite thing to do with berries!!!  There is nothing like cracking open a jar of these...I had a friend who told me she had a bath, and ate the whole jar with a spoon in the tub, (I consider that to be a great compliment)!!

To make the preserves you will need...

8 cups strawberries
2 Tbsp bottled lemon juice
5 cups sugar
7 half pint jars, (250 ml size)

To start, clean and stem the strawberries, then cut them in half.  Put berries lemon juice and sugar into a large saucepan.


Stir, bringing the mixture to a boil.  Cook the mixture on med heat until the preserves thicken...this usually takes about 30-45 min.  Depends on how thick you want them to be.


Remove pan from the heat and skim off the foam that has formed...


Ladle into hot, steralized jars...seal the jars and put them into a water bath canner for 10 minutes.  Put the jars on a flat, dry surface and leave them alone for 24 hours.

Now avoid the temptation to eat them right away...save for fall and winter when you desperately need a strawberry fix!!

Trust me...you want to make these!! 
Happy pickin' and preservin'
xo maureen

Tuesday, June 22, 2010

Solstice Celebration

Yesterday when the sun was radiant in it's full glory, we headed over to our annual celebration spot at Echo Farm. It is a magical gathering space nestled in the rolling hills of Wilno ~ alive with lush, gorgeous gardens, fields full of wild flowers (with a peace sign mowed in it : ) a stage, a fire pit and of course a  big space for the potluck feast. It is one of my most loved community gatherings of the year.  It seems like everyone is glowing  with the joy of welcoming in summer ~ Old friends are re-uniting , kids are  finding their clan to run with, people are pulling out delights in the clothing swap pile,  musicians are jamming on stage,  people are dancing, hula hooping, and poi dancing. Good food is being shared and celebration is in the air with full force!
Last week when we made our sun cake my girls asked if they could make a sun cake to bring to the solstice celebration ~ by them selves!  
I gave up the reigns (not an easy thing for me) and stepped back to simply be the supervisor.  They worked together (with Luna directing!) and this creation was born...


The girls enjoyed walking this tight rope again, and again and again...
I loved being present for this moment in time of big sis being the support for little sis.

The children were ripe with  joy in this beautiful space of freedom
 
  
exploring, playing and soaking up the sweetness...

 We ended our night singing fire's burning to our blazing solstice fire. We then headed back home at the end of this longest day of the year...filled to the brim with sunshine, friends, dancing, fresh air, and fine food! I am grateful to be a part of such a rich, inspired, talented, diverse community to share in celebrating with.

One Love! One Heart!
Let's get together and feel all right.

Bob Marley 
 

Abundant sun infused love to you as you journey into this season of bounty and beauty
~ Shanti~

ShareThis

LinkWithin

Related Posts with Thumbnails